The smart Trick of Hardwood Flooring That Nobody is Discussing
Wiki Article
The Ultimate Guide To Flooring
Table of ContentsRumored Buzz on Hardwood FlooringNot known Facts About Flooring InstallationFascination About Hardwood FlooringNot known Factual Statements About Vinyl Flooring The Buzz on Vinyl FlooringHardwood Flooring Cost Things To Know Before You BuyHow Wood Flooring can Save You Time, Stress, and Money.
Prior to using the second coat, examine the floor for any type of troubles. If there openings or fractures, use the epoxy filler and wait for 12 16 hrs for it to completely dry.Our epoxy floor installers will certainly likewise do justice to the product with expert setup solutions.
Close this dialog home window Share & Even more Back to story Discuss this task this link is to an exterior site that may or might not fulfill accessibility standards.
Not known Details About Wood Flooring
The procedure of measuring, pigmenting, blending, double potting, pouring as well as spreading is duplicated up until the floor is completed. Glass, Cast 3 epoxy coating material has superb self-levelling buildings, so will just need light functioning to ensure that it has full insurance coverage and also a constant thickness - after that the material will certainly do the remainder of the work.Glasscast 3 is likewise self-degassing so the bubbles will stand out on their own, although we discovered a small patch of flooring where bubbles didn't seem to be standing out - this can be because of a little spot of flooring not being pre-sealed - to overcome this we swiftly passed over the surface with a gas torch to rupture them.
Once you more than happy with the flooring it's time to secure the area and also leave it to fully cure - this will permit the resin to degas, self-level and also cure to a fantastic high gloss surface similar to this! Remember it is very essential to secure the area to guarantee that there are no drafts as this could create dust and particles to land in the material during the remedy.
The Ultimate Guide To Flooring Installation
The listed below overview is a summary of the actions on exactly how to apply epoxy flooring paint. This guide relates to a simple roller applied floor. Such epoxy systems are generally used with one coat of primer & 2 coats of epoxy flooring coating. These floorings appropriate for light and also medium damage, best for garages and also storeroom.A Self leveling epoxy floor tends to have a. The below video clip discusses the distinctions in between a roller applied and also a self leveling flooring. Step 1. Preparing the surface prior to applying the epoxy Preparation of the substrate is necessary in order to ensure adhesion between the epoxy item and the substrate.

How Flooring Installation can Save You Time, Stress, and Money.
Utilizing a flooring grinder permits you to utilize various kinds of grinding tools depending on your demands. If you need to grind rough concrete, you require to make use of an aggressive and coarse diamond tool. If you require to provide the existing surface a light sanding, you can choose instead to use a high grit fining sand tool., do not believe cases that priming is not required. Priming will give your floor a longer life and far better bond to the substratum.
Make sure that the locations are aerated appropriately. Sometimes, you will use the primer as well as notification that the item obtains extremely quickly taken in by the substratum. This is extremely common with messy as well as soft concrete based floors. on top of the very first one. Use an appropriate electric mixer to mix the An and B element of the primer.
The Facts About Flooring Stores Uncovered

Many possibly it will certainly likewise need a little bit of fining sand before continuing to the following step. Numerous days have actually most likely passed given that you started the process of installing your epoxy flooring. If you have actually done all the previous steps properly, you are lastly prepared to use the very first coat.
Likewise often remain in the very first coat. If you applied the initial coat with a squeegee several line marks may show up. You image source will certainly require to lightly sand these areas to remove any kind of marks that could be visible on the final floor. After that make use of a hoover to accumulate any type of dirt.
Flooring Stores Things To Know Before You Get This
Ensure that all the new fractures as well as openings are sealed & filled before starting the next coat. If required wait an added completely dry for the cement to dry before re-coating. If you complied with the epoxy flooring process in this article, after that the last coat must be the simplest action.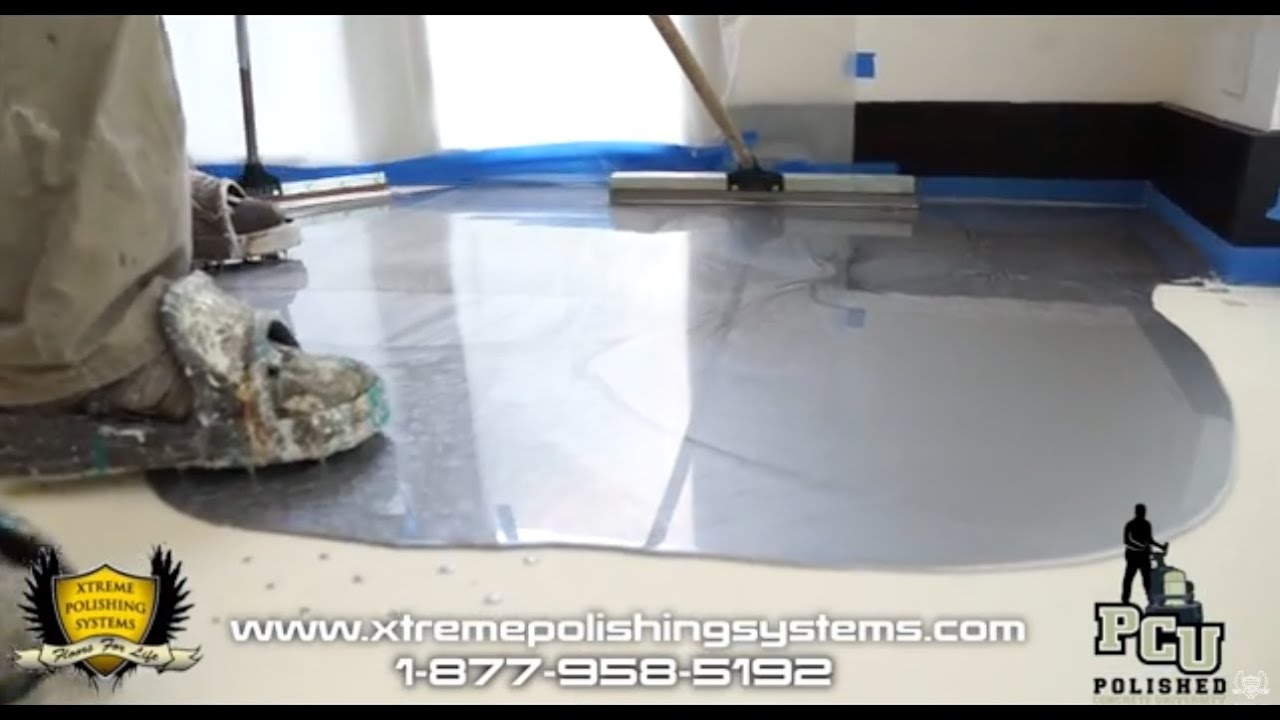
This program was created for applicators that wish to get involved in epoxy floor covering. and also view the understanding product as several times as you desire! You will certainly get that has been distilled into over 20 lessons. We have had hundreds of students from throughout the globe that have actually efficiently finished the program.
Fascination About Flooring Stores
Step 2: Inspect Weather Report Before you begin make sure the air temperature level is 60 levels as well as increasing which your piece is at a minimum of 50 levels. It will certainly be near impossible for the her response epoxy to set if you try to do this in the winter season. Step 3: Sweep It Completely Utilize a mop to clean up the slab.The goal is to not over-wet the floor so it will also dry swiftly. Step 6: Apply Etch Pretreatment Mix the citric acid concrete etch with cozy water per the guidelines. flooring companies near me Apply, scrub, and squeegee off the flooring in the very same fashion as the degreaser. The citric acid will certainly aid open the leading pores of the concrete so the epoxy sticks well.
Allow much longer completely dry times in cooler temperatures. Step 8: Test For Existing Sealant Examine to see if there is still leading sealant on the floor. Drip water onto the slab. If the water beads up, there is an existing sealant that may hinder the attachment of the epoxy. Relying on exactly how much sealer is left, you might need to repeat the etching procedure.
Report this wiki page